Friday, January 23, 2015
PART 1 Creating a new Flash document and choosing a workspace layout Getting started with Flash CS5
- PART 1: Creating a new Flash document and choosing a workspace layout
- PART 2: The document window, the toolbar, and drawing on the stage with the brush tool
- PART 3: Saving your Flash document and knowing the difference between the FLA and SWF files
Welcome to the Getting started with Flash CS5 tutorial series by flashpotential.com. In the first part of this series, where going to learn how to create a new document, and well also get to know a little bit about workspace layouts.
Step 1 - Creating a new Flash document
Launch the Flash CS5 application.
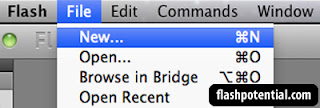
To create a new document, go to the main menu and choose File > New.
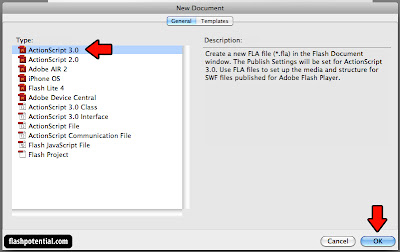
Then from the New Document window, choose ActionScript 3.0, and click OK. Click on the image below to enlarge.
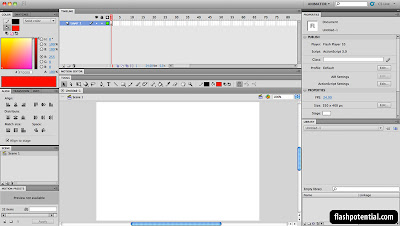
You should now see your new Flash document. Click on the image below to enlarge.
This is your workspace. Its made up of different windows that each have specific functions. Youll see some of those windows highlighted in the image below. Click on the image below to enlarge.
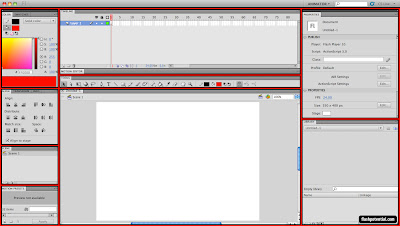
The windows that you see here are just some of the windows that you can work with when you open up a Flash document. Youve got the toolbar, the timeline, the properties inspector, etc... But we wont go through each of them right now. There are a lot! Well learn more about them in the other lessons.
These windows that make up your workspace can be rearranged. You can move them to different locations, adjust the size, you can close some of them, or you can bring up other windows that are not yet visible, etc... The windows that you have open and the way you arrange these windows is referred to as your workspace layout. You can customize your workspace layout or you can choose from any of the preset layouts that are available.
Step 2 - Choosing a workspace layout
To choose a new layout, go to the main menu and choose Window > Workspace. Here youll see all the available layout presets that are available. Youve got Animator, Classic, Debug, Designer, Developer, Essentials and Small Screen.
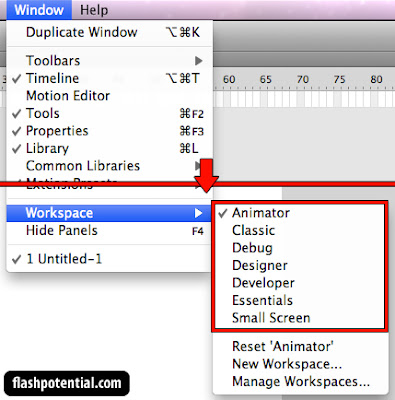
Click on the choices to see how they look like. Youve got the Animator layout, which gives importance to the windows that are most often utilized when one is creating a Flash animation project. Theres the Classic layout, which looks like the default layout of older versions of Flash. Youve also got the Small Screen layout, which creates a workspace ideal for monitors with lower resolutions. Each workspace is designed to fit the needs of a certain type of user. Its a lot like how you fix your own study table or your room at home. You arrange your things in such a way that makes it easier for you to work, relax or play.
Step 3 - Moving, collapsing, expanding and adjusting the size of windows
If you wish to move your windows around, you can do so by clicking on the window tabs and dragging the windows to the desired location.
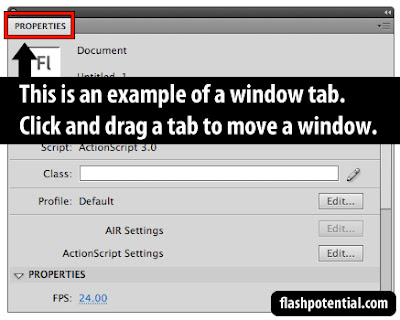
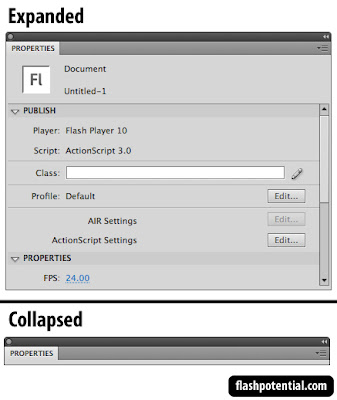
If you wish to collapse or minimize a window, just double-click the tab. To expand a window again, then just double-click the tab again.
If you wish to adjust the size of a window, place your mouse pointer over the edge of the window until the pointer turns into a double-headed arrow.
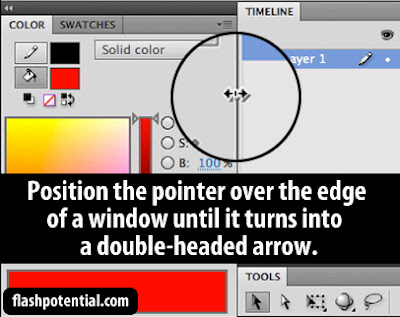
And then click and drag to adjust the windows size. You can adjust from the left or right sides to change the width. And you can also adjust from the top or bottom edges to change the height.
Go ahead and try moving, resizing, collapsing and expanding the windows in your workspace. Dont worry about messing up the layout. Well fix that in the next step.
Step 4 - Resetting a workspace layout
If you find that youve messed up your workspace layout to a point where its quite difficult for you to work, you can reset everything by going to Window > Workspace > Reset [Active Layout].
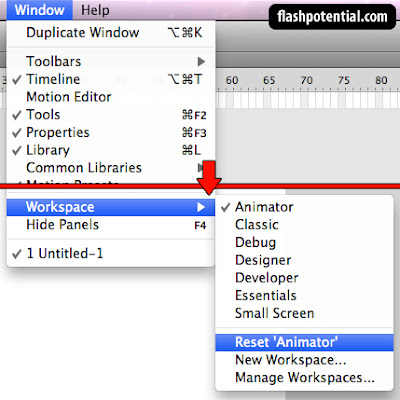
This is going to reset whatever layout is currently active. So if youre using the Animator layout, its going to reset your workspace back to the default Animator layout, and make everything neat and tidy again.
In part 2 of the Getting started with Flash CS5 tutorial series, were going to draw some artwork on the stage.
The document window, the toolbar, and drawing on the stage with the brush tool - Getting started with Flash CS5 - PART 2: NEXT >>
Subscribe to:
Post Comments (Atom)
No comments:
Post a Comment
Note: Only a member of this blog may post a comment.